A lot of users noticed that cloned hard disk shows the wrong size after upgrading to a larger SSD/HDD through certain cloning software. When opening the Windows Explorer, they find that the larger cloned hard drive remains the same size as the old one, but shows full disk size only at the bottom of Disk Management.
Why cloned HDD shows the wrong size in File Explorer? According to a survey, the main reason is that the extra size exceeding the size of the original partition might be recognized as allocated space. But the unallocated section is not visible in File Explorer.
MiniTool Partition Wizard to Avoid Clone Hard Disk Shows Wrong Size
After investigating user reports from different forums, we find the “cloned hard drive shows the wrong size” issue usually occurs after using some cloning software like Clonezilla. To avoid the problem, you can try using MiniTool Partition Manager.
It is a reliable and multifunctional partition manager that can be used to clone a hard drive to a larger SSD/HDD without the wrong disk space. Here’s a full guide to using this tool.
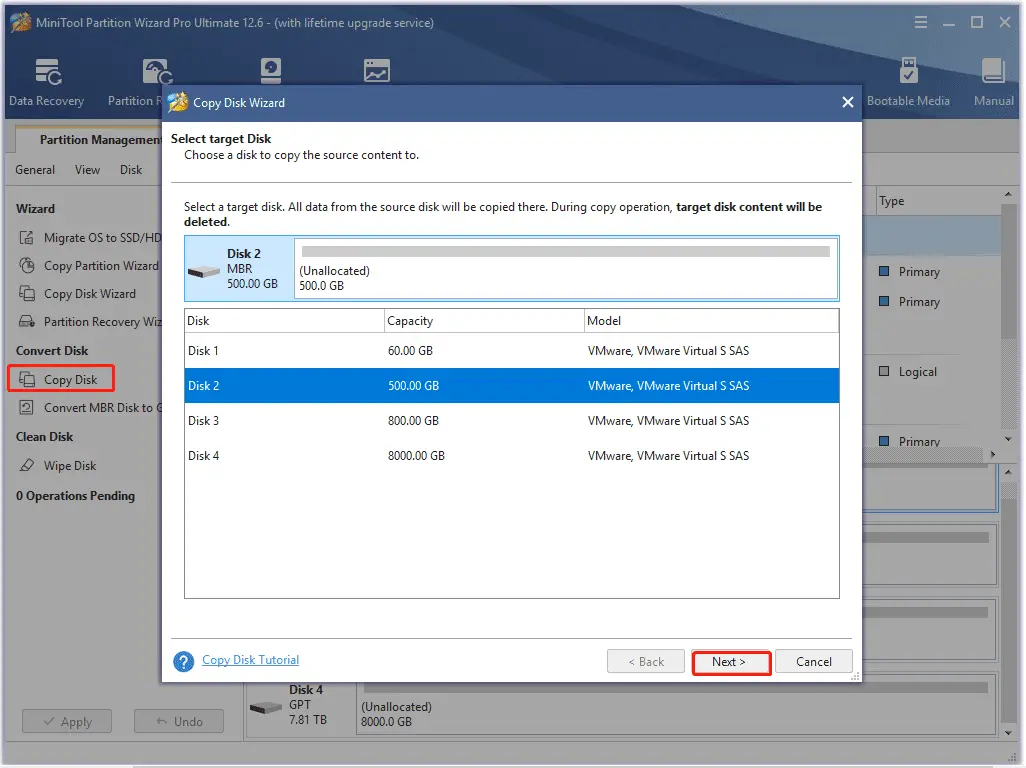
Step 1. In the main interface, select the original hard drive and click on Copy Disk from the left action panel.
Step 2. Select the target disk and click on Next.
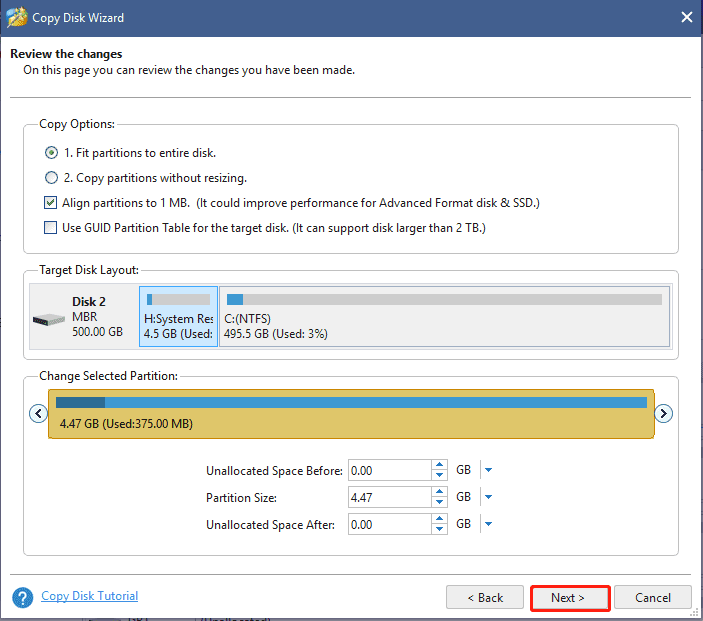
Step 3. Select copy options according to your needs and click on Next.

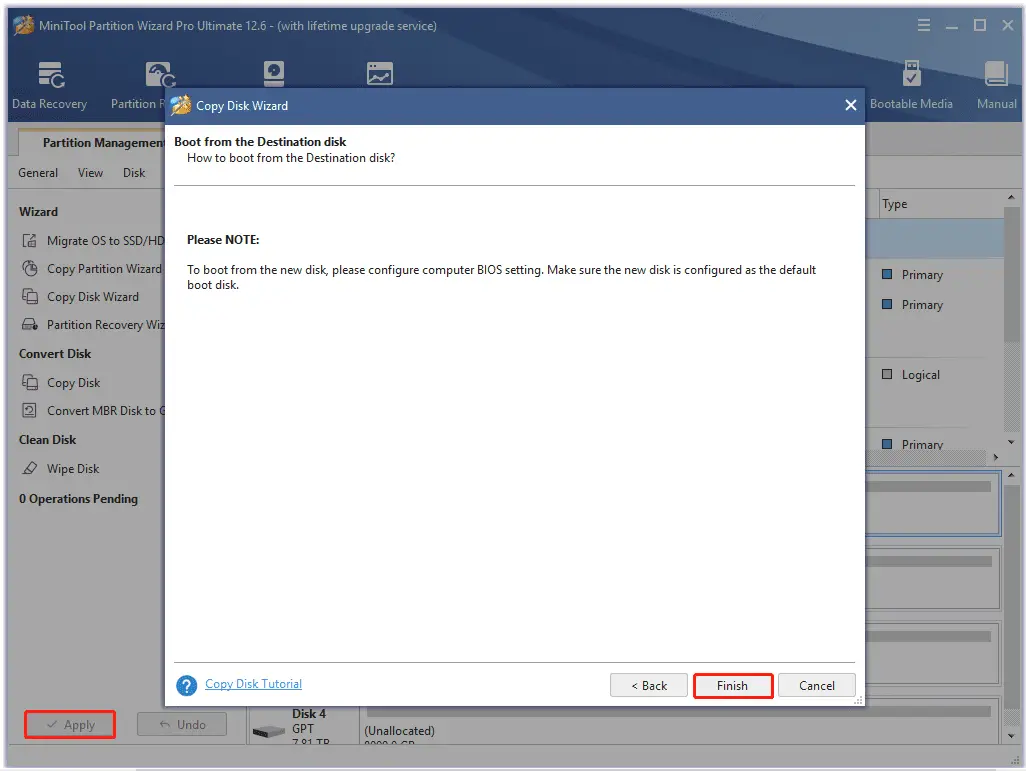
Step 4. Click on Finish and then on Apply to execute the pending operations. Once cloned, open the File Explorer and check if the cloned hard drive shows its full size.
Fix the Cloned Hard Disk Shows the Wrong Size Issue on Windows 10/11
Of course, you can fix the “SSD shows wrong size after cloning” issue directly via the Windows built-in free partition software – Diskpart or Disk Management. Both two tools can be used to shrink the existing partition on the cloned disk and extend it to the unallocated space. By doing so, the full capacity of the hard drive should display in File Explorer.
Method 1. Use DiskPart
You can shrink the existing partition first to display all “hidden” disk space and then extend it to other unallocated space on the cloned hard drive. To do so, follow the steps below carefully.
Step 1. Type diskpart in the search box, and then right-click the utility and select Run as administrator.
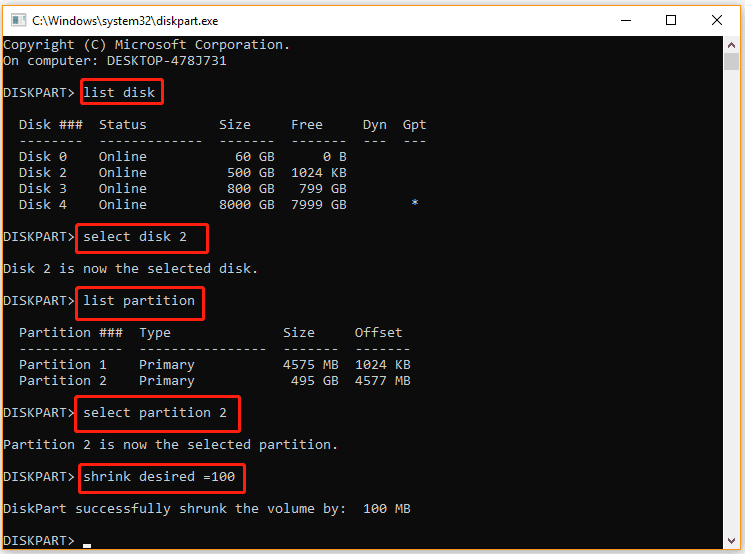
Step 2. Input the following commands in order and hit Enter after each one.
- list disk
- select disk * (* represents the cloned hard disk)
- list partition
- select partition * ((* represents the drive number you want to shrink its volume)
- shrink desired= * (* refers to the amount of space you want to shrink in MB)
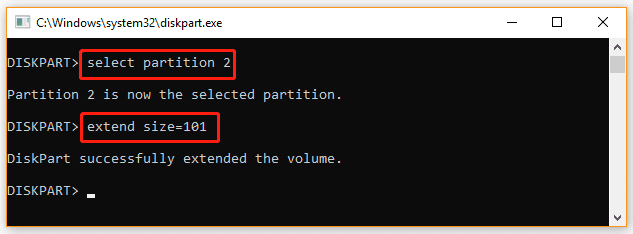
Step 3. Run the following commands to extend the partition to unallocated space.
select partition 2
extend size=* (* represents the maximum available space of the unallocated space in MB)
Method 2. Use Disk Management
Similarly, you can use Disk Management to shrink and extend partitions on the cloned hard drive.
Step 1. Right-click the Windows icon at the bottom left corner and select Disk Management.
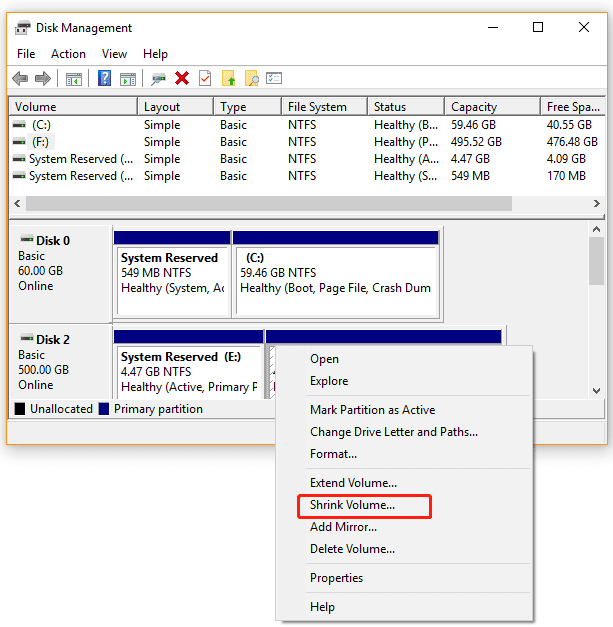
Step 2. Right-click the partition that shows the wrong space and select Shrink Volume.
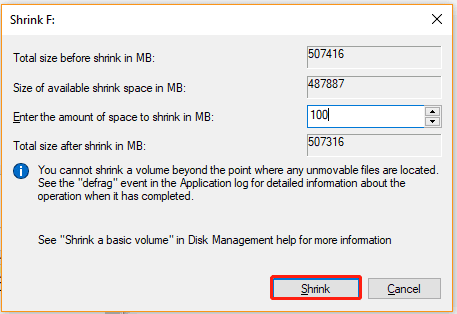
Step 3. Enter a little disk space like 100 MB and click on Shrink to display all remaining space on the cloned hard drive.
Step 4. Right-click the partition that you just shrink and select Extend Volume.
Step 5. Click on Next, select the cloned hard drive, and then input the maximum available unallocated space in MB and click on Next > Finish. Once done, open File Explorer and check if the cloned hard drive shows its full space.