Shield
Shield is an app to protect against process injection on macOS.
Using Shield
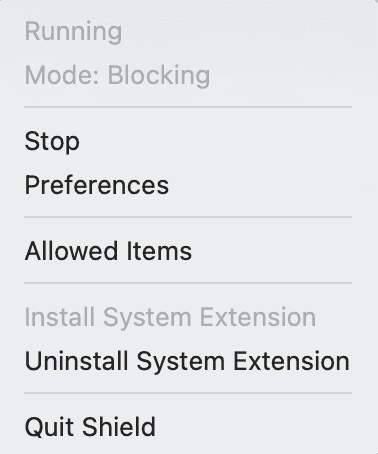
The application doesn’t have a normal window mode app, it’s menubar only. When we start it, we will see a new menubar icon, in a form of a dot showing up.
Clicking on it, brings up some basic controls, as shown below.
Before we can really do anything, we need to install the system extension. When we start the application it will start the installation process and popup windows on how to do it. We need to approve it in Security and Privacy just like when we install a new kernel extension. Once it’s approved it will be loaded, however, I don’t autostart the ES client, so by default, it will be stopped.
If we want to uninstall the agent, we need to click on the related menu option. Note that it doesn’t delete the app, it will just uninstall the SEXT. For that, to fully complete we need to reboot macOS, as macOS can’t fully remove an SEXT without a reboot.
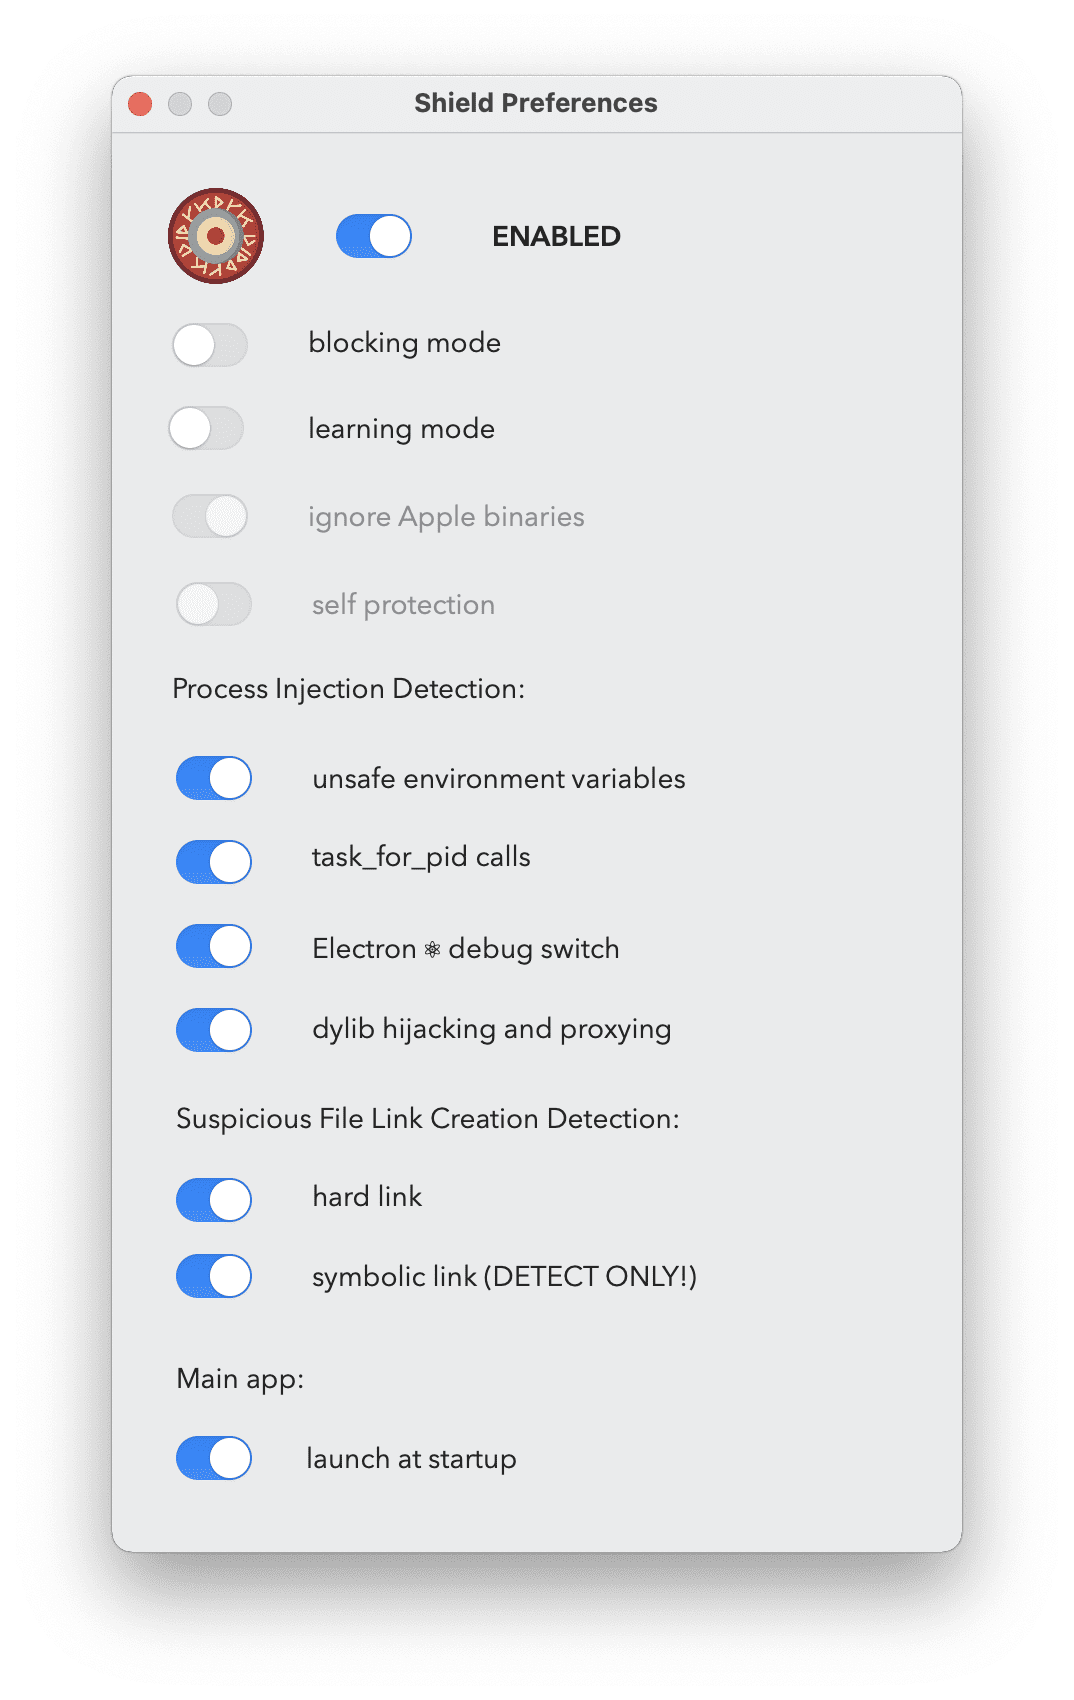
Once the SEXT is installed we can start the Endpoint Security client, by either clicking “Start” or opening preferences, and toggling “ENABLED”. The state of the buttons is refreshed from the SEXT.
There are not many options, so I will cover them one by one.
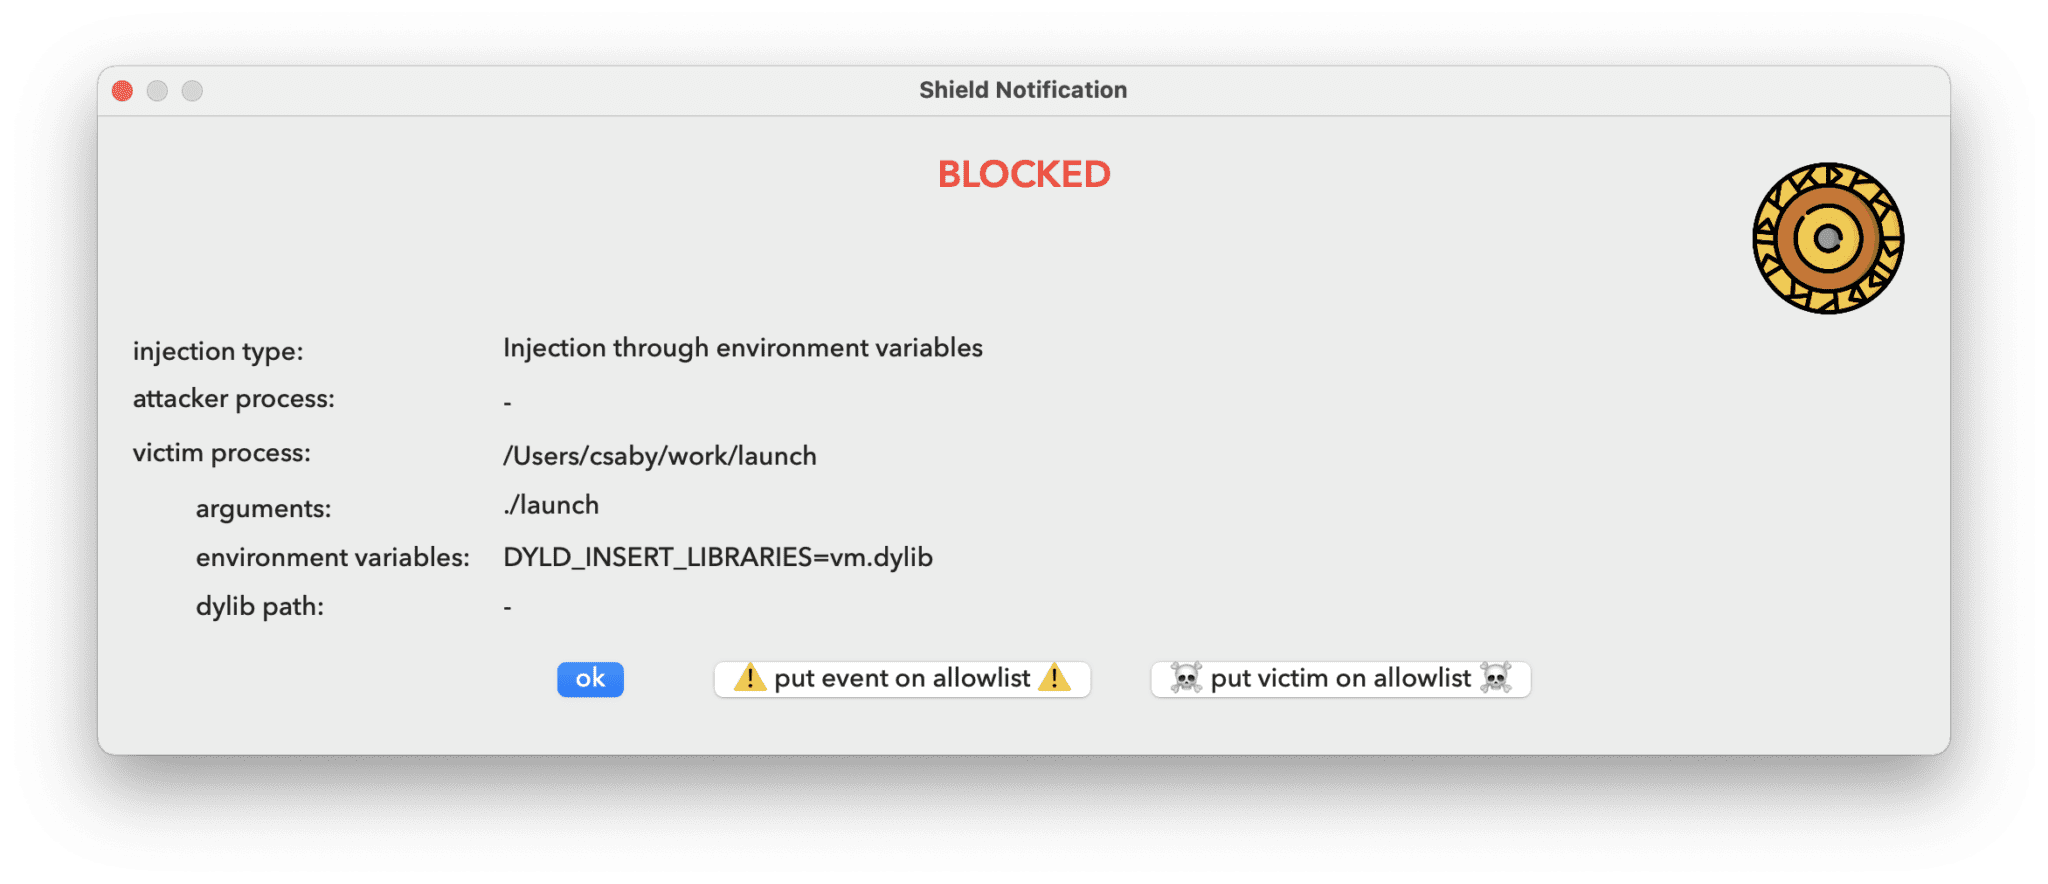
Blocking mode means that if it detects an injection attempt, that is configured next, it will block it. In the case of environment variables, which is typically happening at the time of the process starting up, it will mean that the process that is the target of the injection can’t start, it will be blocked. If there is an injection attempt we will get a notification, and it will be also logged to the system log.
When we get a notification we can always choose allowing it for the next time, so we don’t get alerted next time.
If we switch off blocking mode, we will still get alerts and logs, but they will be allowed.
Once blocking mode is disabled, we can enable “learning” mode, which means that everything that would create an alert will be automatically added to the list of allowed injections, and we won’t be alerted.
The next option is the ability to monitor Apple binaries. For now, this is unchangeable, platform binaries are ignored. The main reason for this is that they do an extreme amount of task_for_pid calls, and just handling of those without any action causes 20% CPU usage. Right now, these processes are pruned very early, and thus we get a nice 0% CPU utilization. I have a to-do here to improve the logic, so system binaries can be monitored as well, although I think it’s not that a huge issue for now, because as noted earlier, generally platform binaries are very well protected against these attacks.
Next, we can enable or disable specific protections.
The environment variable injection is monitoring the presence of any of the following three as of the time of writing: DYLD_INSERT_LIBRARIES, CFNETWORK_LIBRARY_PATH, RAWCAMERA_BUNDLE_PATH, and ELECTRON_RUN_AS_NODE. If any of these presents, the app will not launch. I figured out this can cause issues with Firefox.
The next setting is for task_for_pid calls when one process wants to get the task port of another. This will block debugging, as a debugger will perform this call. So if you need to debug, you may want to switch this off temporarily.
The following one is specific to Electron apps. Typically someone can use –inspect, –inspect-brk, and –remote-debugging-port command line argument to start an Electron app in debugging mode, and thus inject code to it. Here I simply check if this argument is present and if yes, the app will be blocked.
The last option in process injection settings is to enable protection against dylib hijacking and proxying by enforcing library validation. Unfortunately, I could only achieve this by doing static code signature checks on dylibs on disk, so due to disk IO, it can delay large apps (like Xcode) to start, otherwise, it’s hardly noticeable. I enabled caching and that makes it manageable.
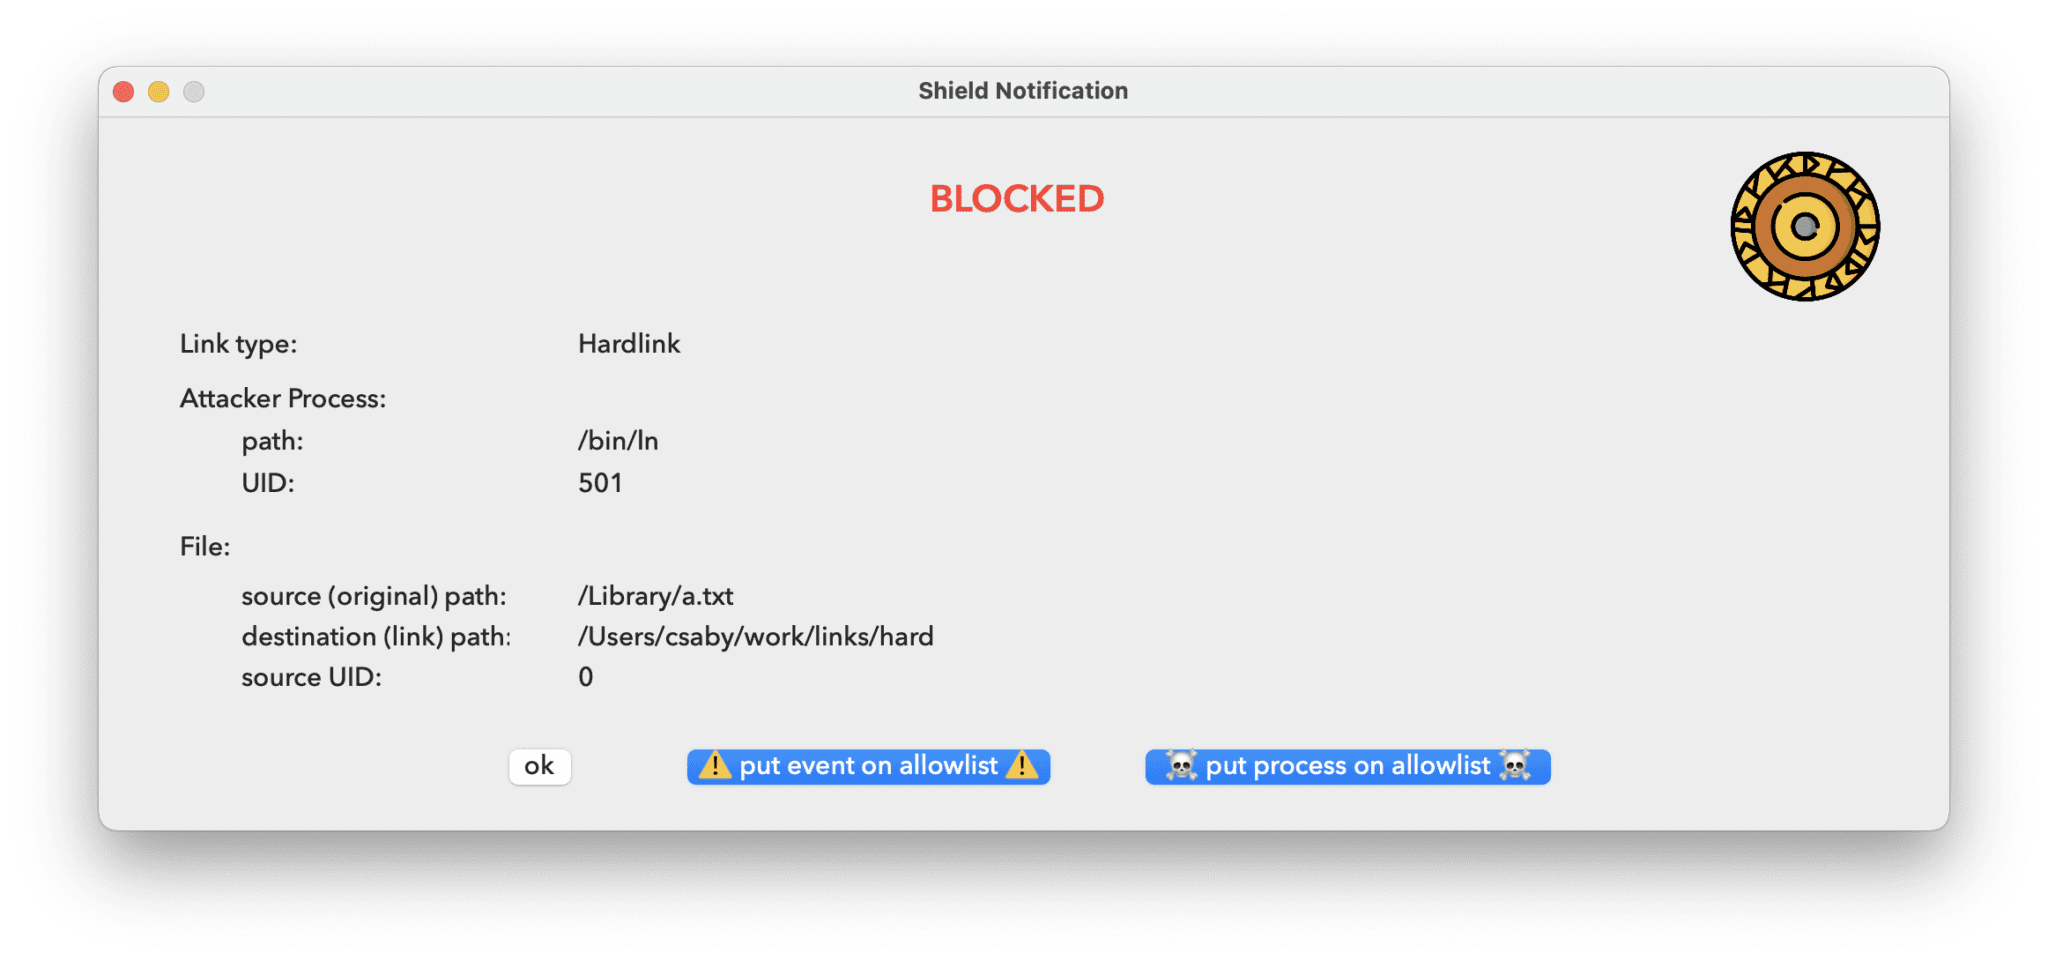
The next two settings are related to file system links. Typically the most common abuse is to place a link with our user privileges and point it to a higher privilege location. The detection is very simple for both hardlink and symlinks. If the process creating the link has a different privilege level than the target file, we create an alert. Unfortunately in the case of symlinks blocking is not possible, as we don’t have information about the destination of the link prior to creation. This is a limitation of Apple’s EndpointSecuriy framework. The simple logic would eliminate all of the symbolic link exploits I did in the past.
Notification for these events will be different from the ones we get for process injection. Here we will see the process’s UID, as well as the link’s target file (source) UID, along with the actual link’s path (destination) to where it points (source).
Finally, there is a switch to autostart the Shield main app (menu item) upon startup. This will install and uninstall a standard Login item.
All of the preferences that are configured are saved into /Library/Application Support/Shield/com.csaba.fitzl.shield.preferences.plist.
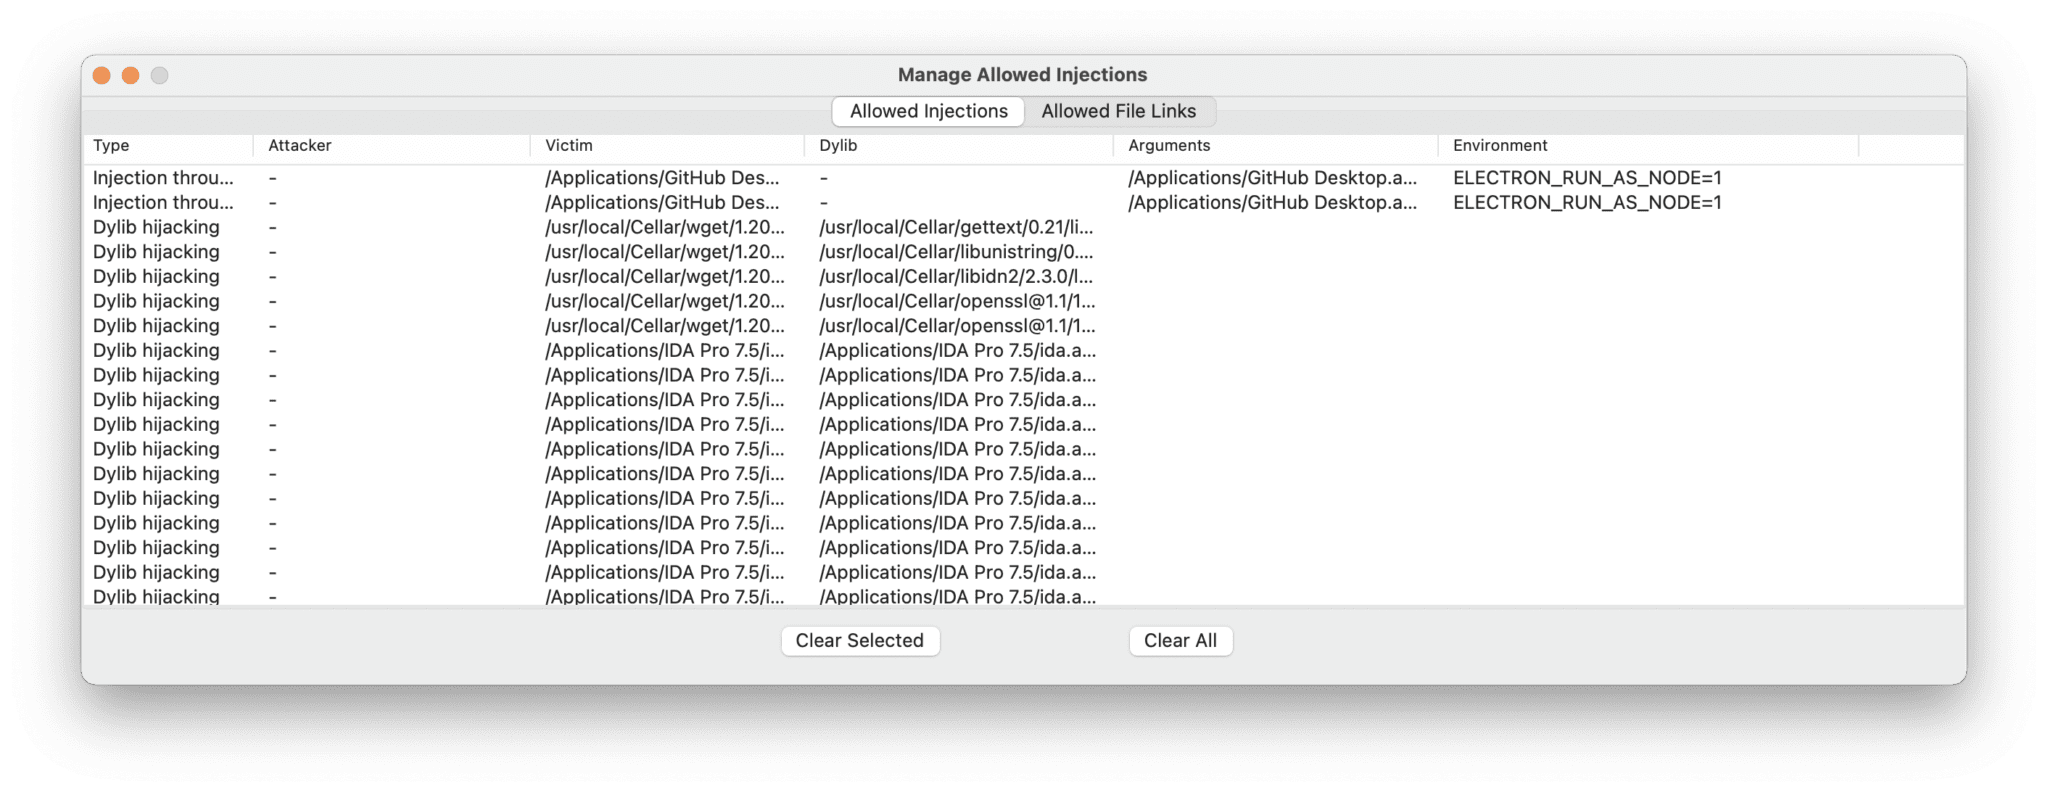
The last thing to discuss is the “Allowed Injections” menu.
Here we will get an overview of all the allowed injection, that won’t generate a notification anymore, and will be always allowed. Unsigned binaries will need to be allowed on this list, as well as some other apps that use injection legitimately. For example “GitHub Desktop” uses “ELECTRON_RUN_AS_NODE” when we push a change to our repository.
The view is split between allowed file link and process injection events, and we can remove items from both. The button “Clear All” will wipe both lists.
