GoodHound
GoodHound operationalises Bloodhound by determining the busiest paths to high-value targets and creating actionable output to prioritise remediation of attack paths.
Usage
Quick Start
For a very quick start with most of the default options, make sure you have your neo4j server running and loaded with SharpHound data and run:
pip install goodhound
goodhound -p “neo4jpassword”
This will process the data in neo4j and output 3 csv reports in the GoodHound directory.
Default behaviour
All options are optional. The default behaviour is to connect to a neo4j server setup with the default location (bolt://localhost:7687) and credentials (neo4j:neo4j), calculate the busiest paths from non-admin users to high-value targets as defined with the default Bloodhound setup, and print the ouput to the screen.
The neo4j database will need to already have the Sharphound collector output uploaded using the Upload button in the Bloodhound GUI. An example Sharphound output collected using Bad Blood on a Detection Labs can be found in this repo at /Sample%20SharpHound%20Output.
The output shows a total number of unique users that have a path to a HighValue target.
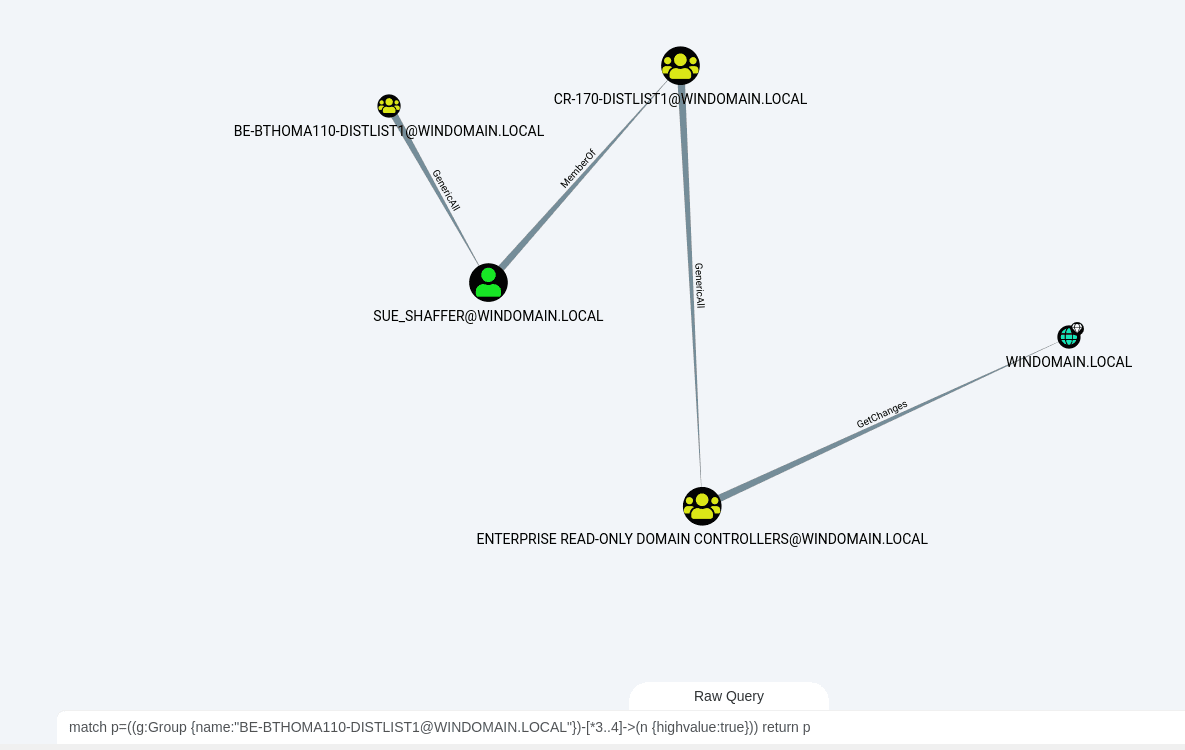
It then breaks this down into individual paths, ordered by the risk score (more on this later). Each path is then displayed showing the starting group, the number of non-admin users within that path, the number of hops, the risk score, a text version of the path, and also a Cypher query. This cypher query can be directly copied into the Raw Query bar in Bloodhound for a visual representation of the attack path.


Options
Database settings
-s can be used to point GoodHound to a server other than the default localhost installation (bolt://localhost:7687)
-u can be used to set the neo4j username
-p can be used to set the neo4j password
Output formats
-o can be used to select from:
- stdout -displays the output on screen
- csv saves a comma separated values file for use with reporting or MI (completing the graphs, actions, charts trifecta in the tagline)
- md or markdown to display a markdown formatted output
-f an optional filepath for the csv output option
-v enables verbose output to display query times
Number of results
-r can be used to select the amount of results to show. By default the top 5 busiest paths are displayed.
-sort can be used to sort by:
- number of users with the path (descending)
- hop count (ascending)
- risk score (descending)
Schema
-sch select a file containing cypher queries to set a custom schema to alter the default Bloodhound schema. This can be useful if you want to set the ‘highvalue’ label on AD objects that are not covered as standard, helping to provide internal context. For example, you want to add the highvalue label to ‘dbserver01’ because it contains all of your customer records. The schema file to load in could contain the following cypher query:
match (c:Computer {name:’DBSERVER01@YOURDOMAIN.LOCAL’}) set c.highvalue=TRUE
The schema can contain multiple queries, each on a separate line.
Query
-q can be used to override the default query that is run to calculate the busiest path. This can be useful if your dataset is large and you want to temporarily load in a query that looks at a smaller set of your data in order to quickly try GoodHound out.
Care should be taken to ensure that the query provides output in the same way as the built-in query, so it doesn’t stop any other part of GoodHound running.
The original query is :
and so an example to retrieve a subset might be:
SQLite Database
By default Goodhound stores all attack paths in an SQLite database called goodhound.db stored in the local directory. This gives the opportunity to query attack paths over time.
–db-skip will skip logging anything to a local database
–sql-path can be used to point Goodhound to an SQLite db file that is not stored in the default location. The db file will be created in the set location if it does not already exist.
Performance
Larger datasets can take time to process. Some performance improvements can be seen by selecting to “warm-up” the database using the option in the Bloodhound GUI. There are also many guides for tuning the neo4j database for increased performance which are out of scope here (although if I make any significant improvements I’ll document the findings).
Changelog v1.1.2
- Fix bug with userpath call
- Move hosted image away from github
Install
Copyright (C) 2022 idnahacks