
Striker C2
Striker is a simple Command and Control (C2) program.
Features
A) Agents
- Native agents for Linux and windows hosts.
- Self-contained, minimal python agent should you ever need it.
- HTTP(s) channels.
- Asynchronous task execution.
- Support for multiple redirectors, and can fall back to others when active one goes down.
B) Backend / Teamserver
- Supports multiple operators.
- Most features are exposed through the REST API, making it easy to automate things.
- Uses web sockets for faster comms.
C) User Interface
- Smooth and reactive UI thanks to Svelte and SocketIO.
- Easy to configure as it compiles into static HTML, JavaScript, and CSS files, which can be hosted with even the most basic web server you can find.
- Teamchat feature to communicate with other operators over text.
The Web UI
1) Agents Menu
This is where you will find yourself following a successful login;

This is where all the agents in the server, active ones or otherwise, will be listed. To interact with an agent, simply click on it in the list. This will open the agent handling menu, which has 4 tabs;
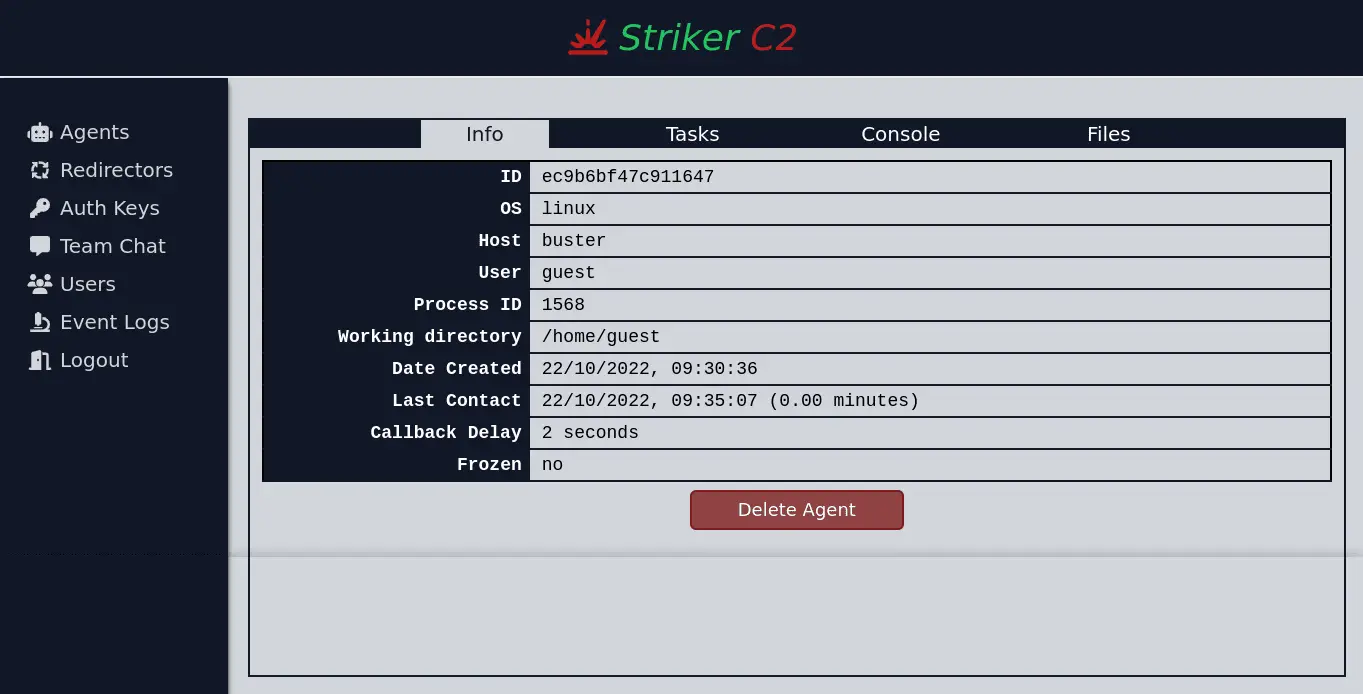
The Info tab shows some information about the agent, including the agent ID, the operating system, the name of the user the agent is running as, and more;
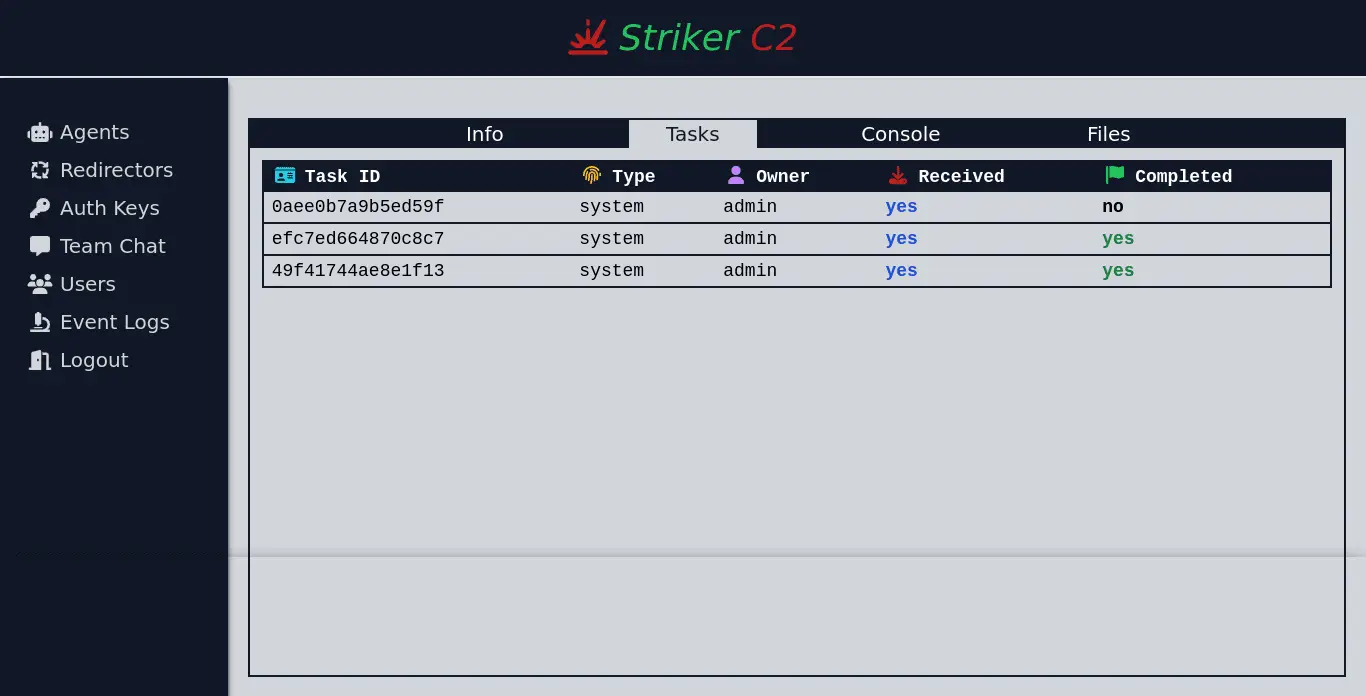
The Tasks tab shows a list of all tasks created for the agent;
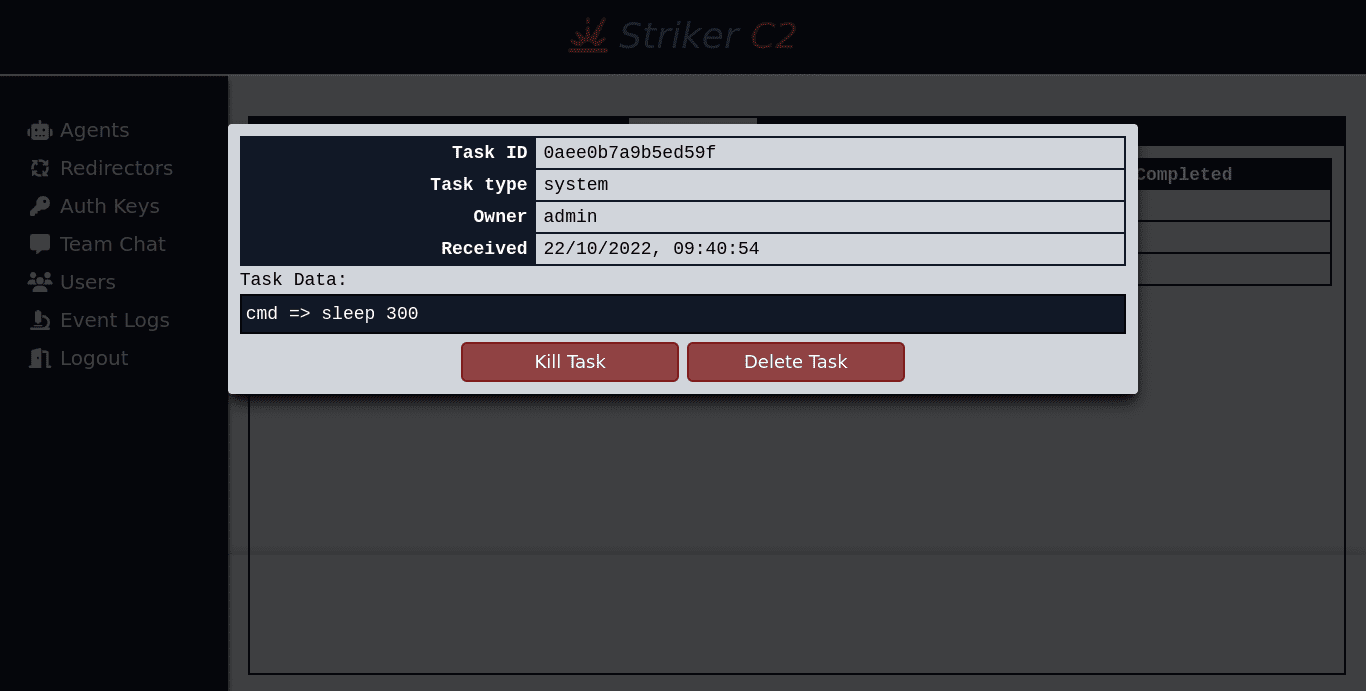
Like most lists you will see in the UI, the listed tasks are clickable, and doing so will open a modal with information about the task;
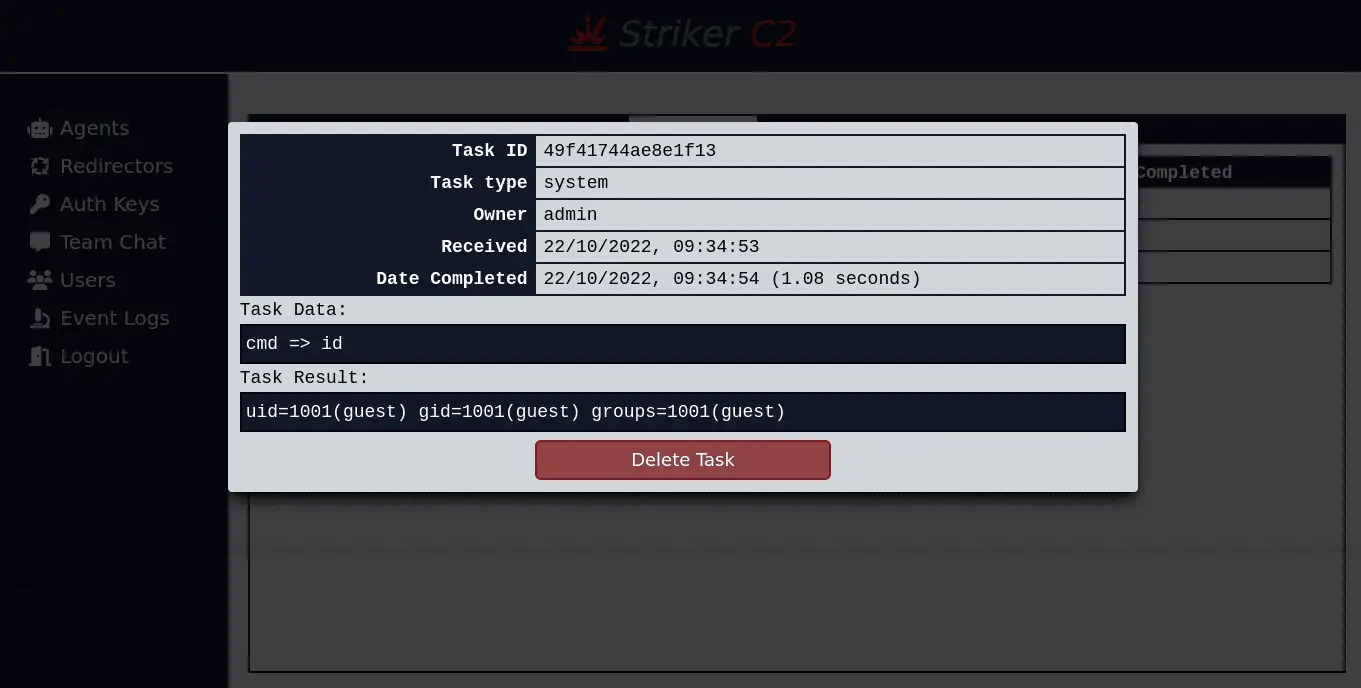
Note that although the scrollbar is invisible in the modal, you can still scroll down when some text is out of view. The task result field also has a scroll feature of it’s own, which helps for tasks with the large result.
(Tip: hovering on a listed task will show a small tooltip with the task data);
The contents of the task modal will vary depending on the state of the task. For tasks that have been received by the agent, but not yet completed, you will have the option to kill the task. As this is merely a flag passed to the running task by the agent, it won’t work for some tasks;
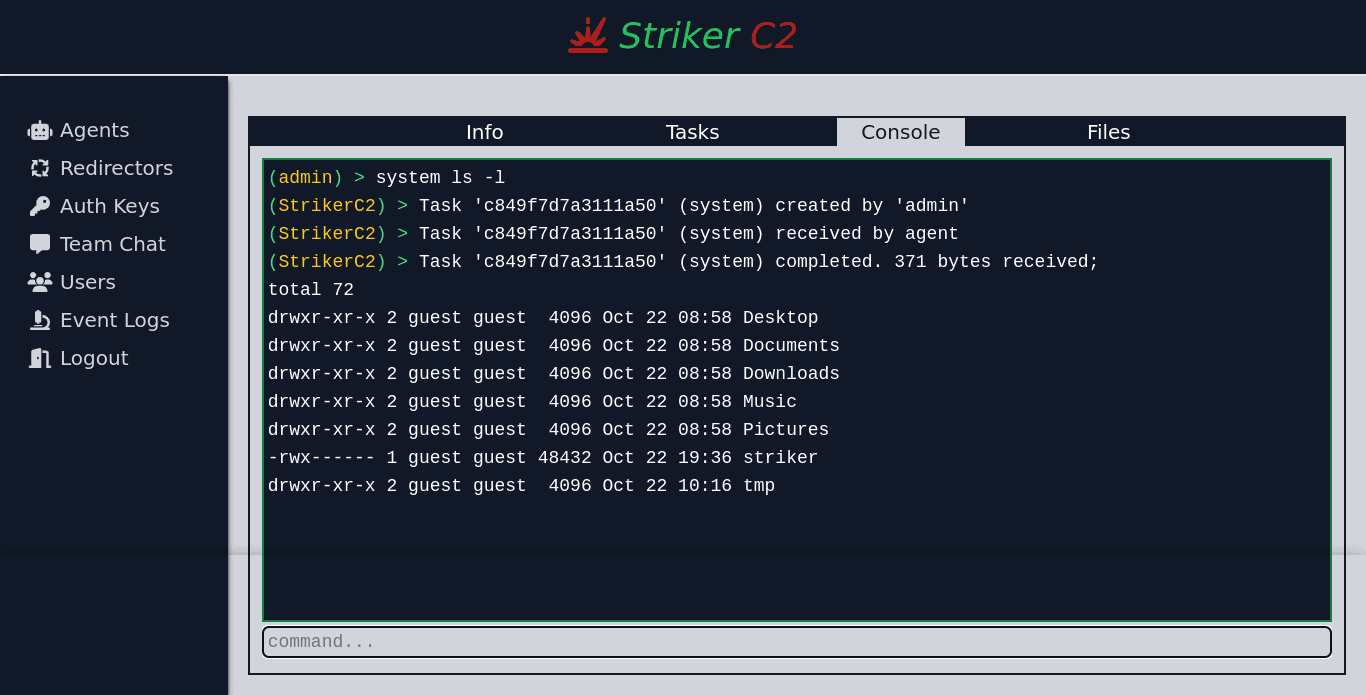
The Console tab provides you with a simple console for interacting with the agent. This is where you will likely spend most of your time when handling active agents. To get a list of all available commands in the context of the agent, type help or ?;

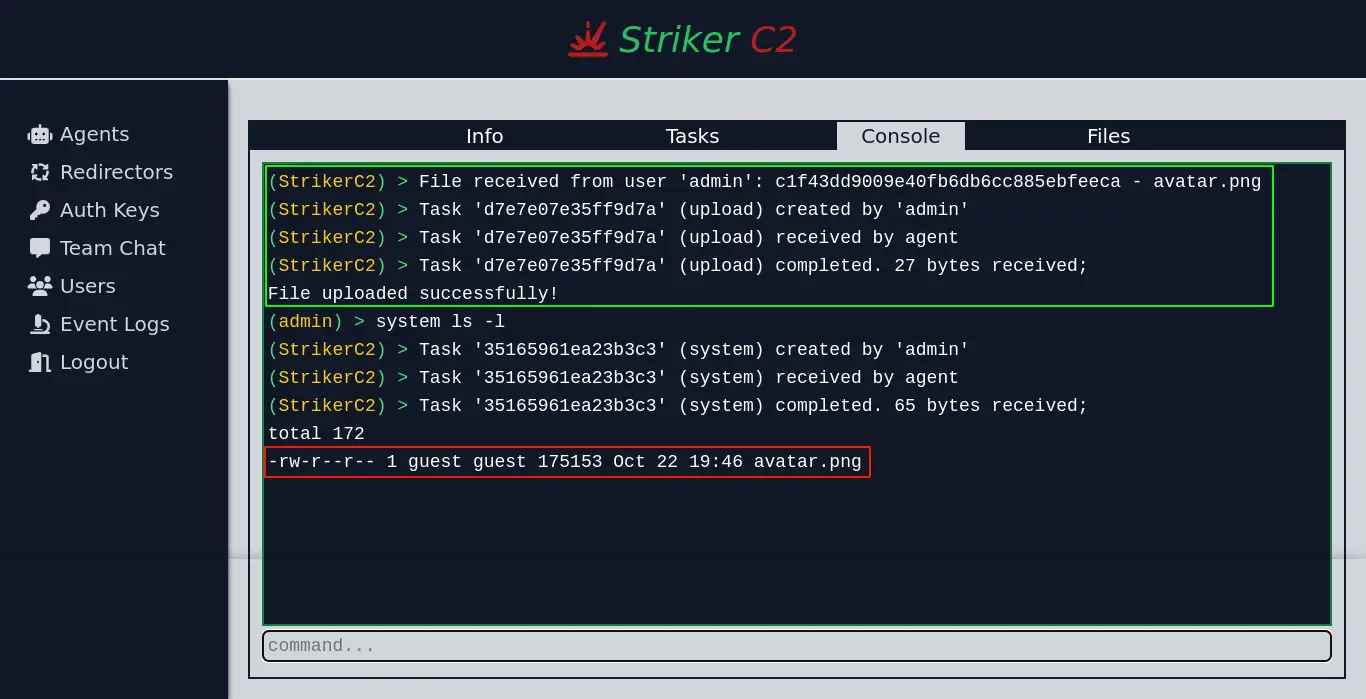
The following is an example of using the console to run a shell command on the agent;

(Tip: You can use the up and down arrow key to move between previous commands, which could save you from retyping long commands)
The Files tab is where you upload files to the agent or download them to your machine. When uploading a file to an agent, the file is first uploaded to the C2 server, and a task is then automatically created for the agent to download the uploaded file. The file will be saved to the working directory of the agent, so make sure you are in the right place. A successful upload for a file looks something like this;

Going to the agent console tab, you should see something like this (the text in green is from the file uploaded by the user and the automatic download by the agent);
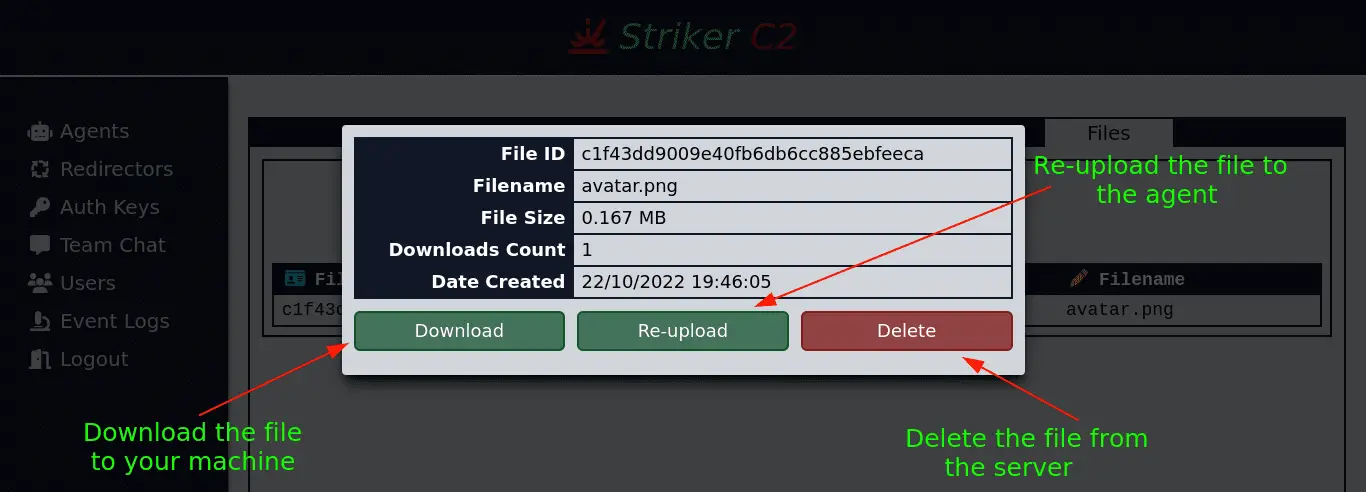
Files you download from an agent are also displayed in the Files tab. Clicking on a listed file will open a modal for the file;
2) Redirectors Menu
This menu is used to maintain a list of URLs for active redirectors. This list is sent to all agents when they first connect to the server.

Note that this must not necessarily be a redirector, but can also be another C2 server. This is because for an agent, there is no difference between the two. Just make sure that all redirectors and C2 servers in the list lead to C2 servers that share the same backend database. This is because should a redirector or a server go down while an agent has an active session on it, the agent will fall back to other redirectors/servers and attempt to resume the session it was previously using. Should it fail, the agent will exit.
3) Auth Keys Menu
This menu is used to manage the authentication keys used by agents when creating a session on the server. There are two types of keys;
- volatile – This is a key that can only be used once. Once used, it will be automatically deleted by the server. This is the recommended key type to use since someone may run your agent multiple times to flood you with sessions. A downside to this is you will need to build a new agent with a new auth key for every session.
- static – This key can be used multiple times. Saves you from having to build multiple agents with different keys each.
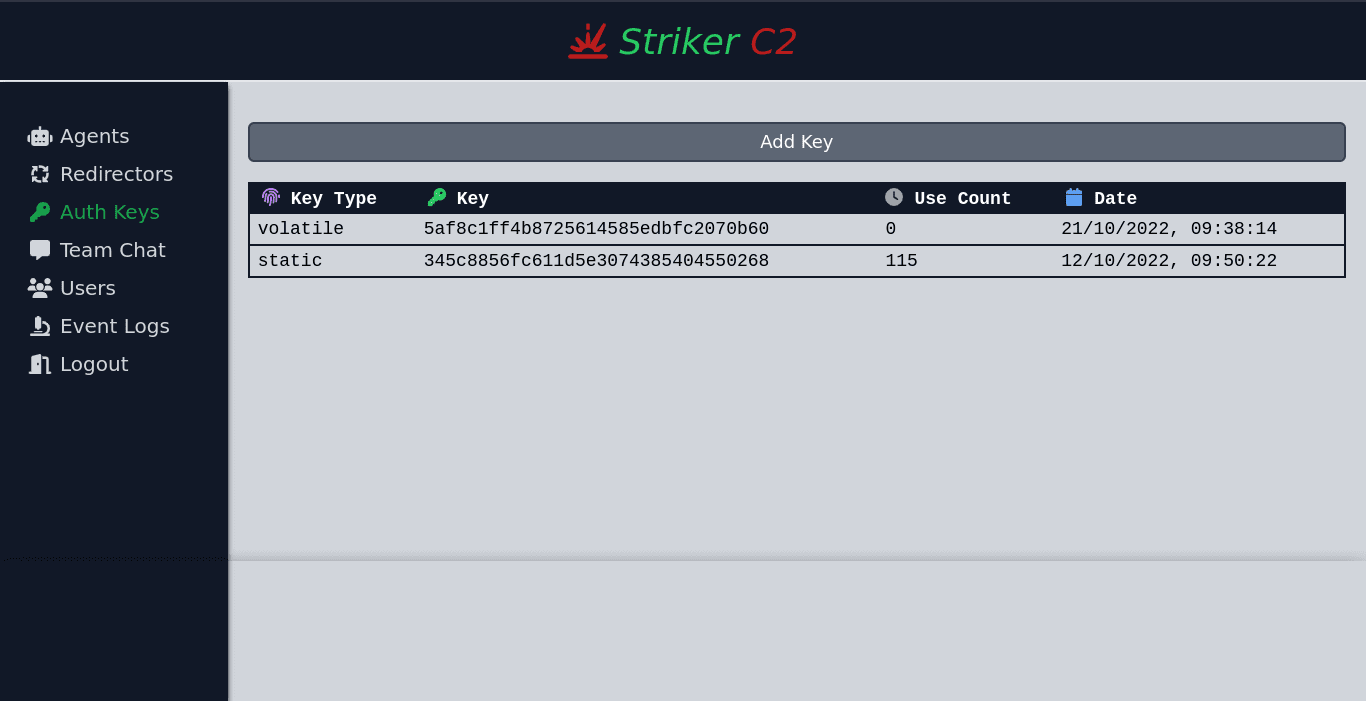
To add a new key, click on the Add Key button. This will open a modal for adding a new key with a random string;

Clicking on a listed key opens a modal;

4) Team Chat Menu
This menu is used for communicating with other operators over plain text. Some server events are also displayed here, like user login and new agent callbacks;
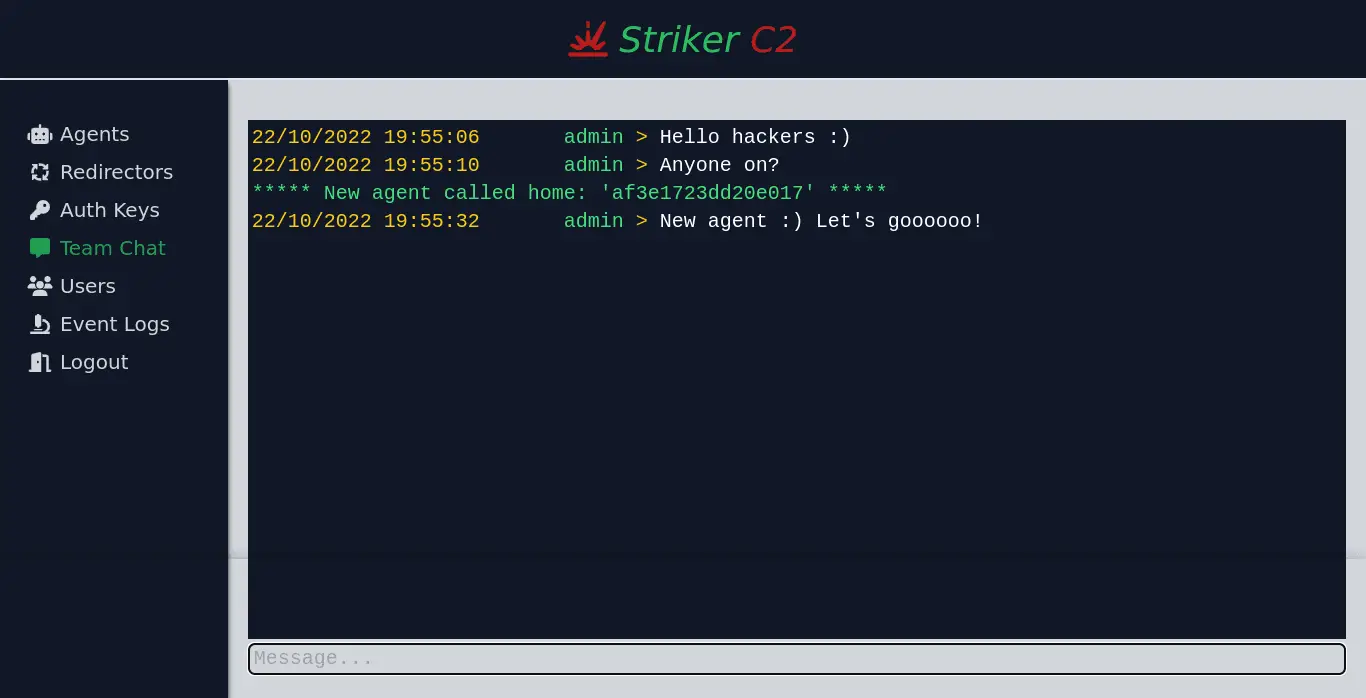
Inputs that start with / are treated as commands;
- /users – List logged in users.
- /clear – Clear chat logs, in case someone committed some cringe 🙂
5) Users Menu
For admins only. You will be using this to manage all operator accounts on the server;

Notice the color difference in the listed users. Online users are colored green, suspended/disabled accounts are colored cyan, and others are colored black.
Clicking a user will open a modal you can use to reset the account password, manage admin privileges, suspend/activate the account, or delete the account;

6) Event Logs Menu
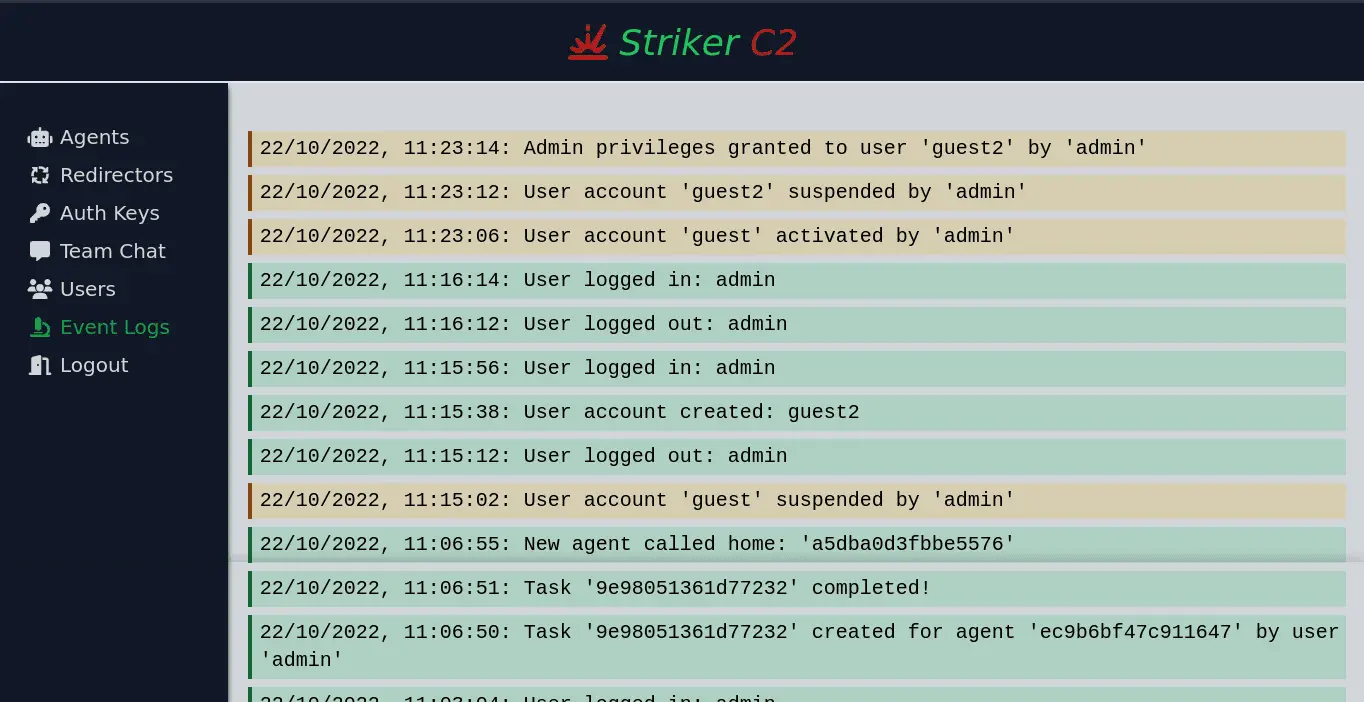
For admins only. This menu displays the latest 250 event logs created in the server. Logs colored green are status logs, yellow is warning logs, and red are error logs;
Install
Copyright (C) 2022 Umar Abdul